How do you make a Smartphone movie for TV and Cinema?
A few years ago I would have said it wasn’t possible to use a Smartphone for making content for television or cinema but they are now often in use. I wouldn’t recommend using one for a high-quality drama but for documentaries they are becoming more common. This is mainly because you can film with a Smartphone in places where a large camera would bring attention or large amounts of equipment would not be convenient. They are also good for news with many journalists now using them.

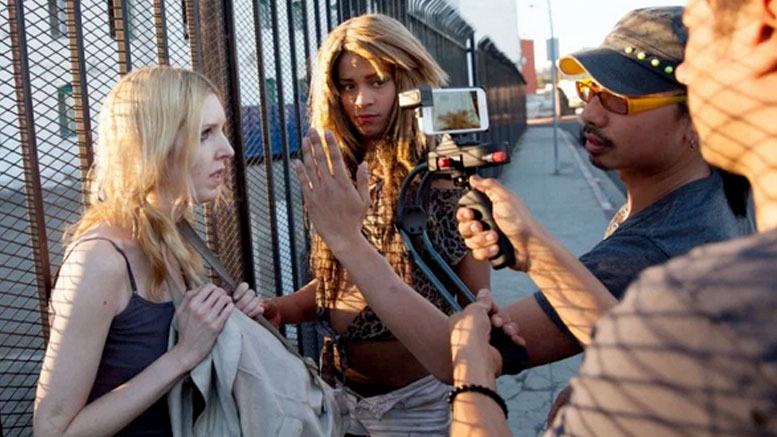
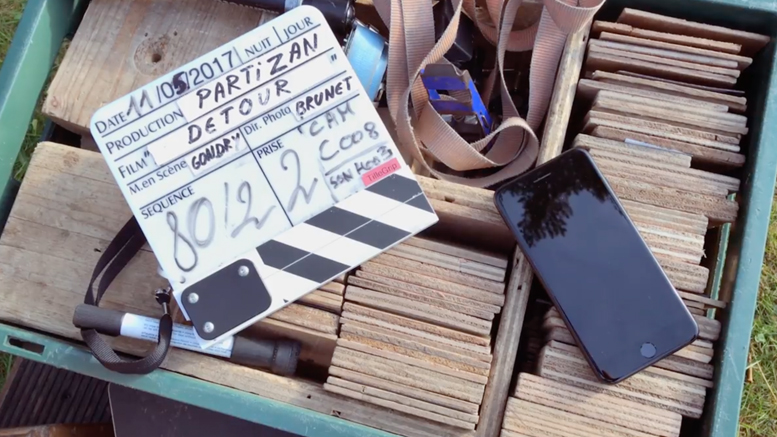
Movies are also now made with Smartphones. The Smartphone movie Tangerine was a breakout hit at the Sundance film festival in 2015 and took everyone by surprise. Tangerine is unusual because it was one of the first movies shot on the iPhone 5s. With the help of an anamorphic lens adaptor for the iPhone the director, Sean Baker, gave Tangerine a unique cinematic look. With the help of co-director of photography Radium Cheung, Sean had maximum mobility with the iPhone 5s. This meant that between them they could capture the video for Tangerine in a particular way, which gave them freedom to move around. Because of the small and compact design of the iPhone 5s they could film in locations, which would not have been available to them with larger cameras.
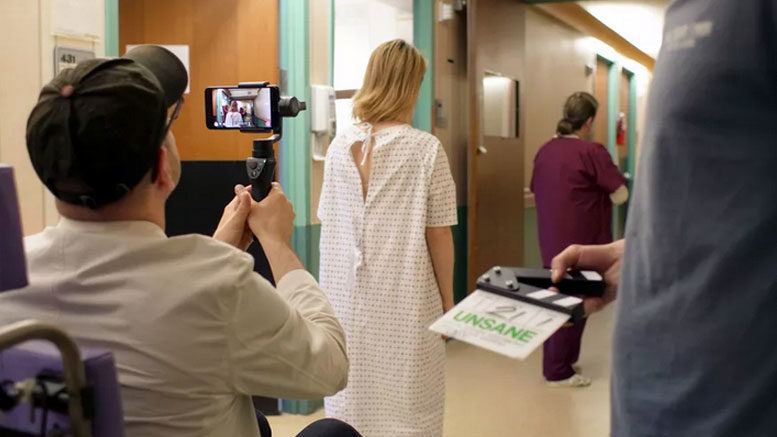
Since Tangerine, other filmmakers have followed suite and started to make feature films with their iPhones. Steven Soderbergh used the iPhone 7 Plus to film his feature film Unsane. The film features big stars such as Claire Foy, Juno Temple and Amy Irving. He then went on to film High Flying Bird on the iPhone 8. So with enough talent anyone can make a feature film with a Smartphone. Just be aware you still need to light effectively, have a great script, good actors and record great sound, just as you would for any other movie.
Shooting in 4k
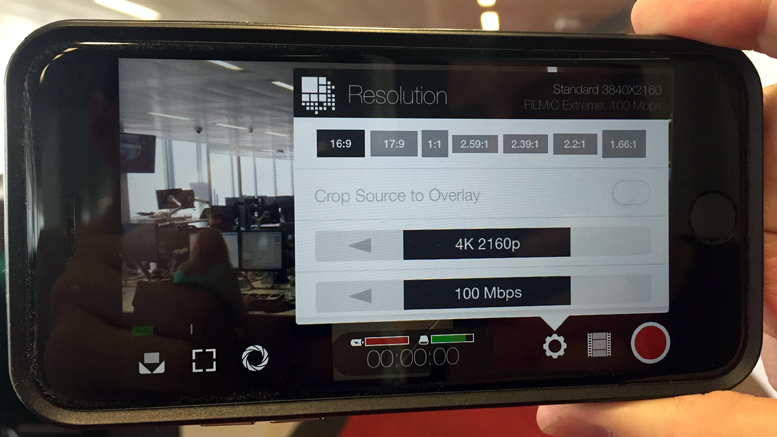
4K video arrived on the iPhone 6s and 6s Plus in September 2015 and has been a feature of other Smartphone makers for some time. Some Smartphones will even film in 6K. 4K will give you roughly four times the pixels of HD and improved video quality. One of the disadvantages with 4K is the file sizes are bigger and will take up a greater amount of space on your Smartphone’s hard drive. If you do choose to film in 4K with a Smartphone there are many pros and cons you need to consider.

If you decide to shoot in 4K you should ask if your video needs the extra resolution the format gives you. Not long ago HD was more than good enough for most video content, and still is. Most television channels only broadcast in standard definition and not HD, let alone 4K. The advantage of a 4K image is it will give you better picture quality over HD and reduce the effect of colour banding that can affect lower resolution images. So do you need the extra definition that 4K can give you? It really depends on what you are trying to make.
Scaling the video image
4K will give you four times the pixels of HD. This means if you add a 4K video clip to a 1920 x 1080 HD sequence you will have to scale it down to fit. The advantage of this is that you can move around this video image and select different parts of the image for your shot. An example of this would be if you filmed a two-person interview in a wide shot. This would give three shots for the price of one. You would have the wide shot of both participants talking and you could push in on each individual as well.
This may seem like lazy filmmaking, but if you are in a rush, or only get one take at the interview, it can be a lifesaver. There are limits to this method. You can only push in 50% before the image starts to degrade. With the extra resolution 4K gives you on a HD timeline you can also do camera moves around the image. You can start zoomed in on one individual and then pull back to reveal a larger scene. You can also do camera moves from left to right and up and down without losing resolution. This can be handy for improving a static wide shot, and can help to make your video more exciting.
Image stabilisation
Smartphones suffer from wobble if not mounted to a tripod or some form of stabiliser or gimbal. If you shoot HD and use an image stabilisation effect you will lose image quality. This happens because the image stabilisation software has to push in on the video, and then jiggle it around using the surrounding video as a buffer to knock out the bumps. If your video is shaky, this push in can be a great amount.

However, if you shoot 4K you will no longer have this problem. You can smooth out the bumps by using image stabilisation on your video shot in 4K. You can then scale down the stabilised video on to your HD timeline and will have no loss of resolution and shake free video.
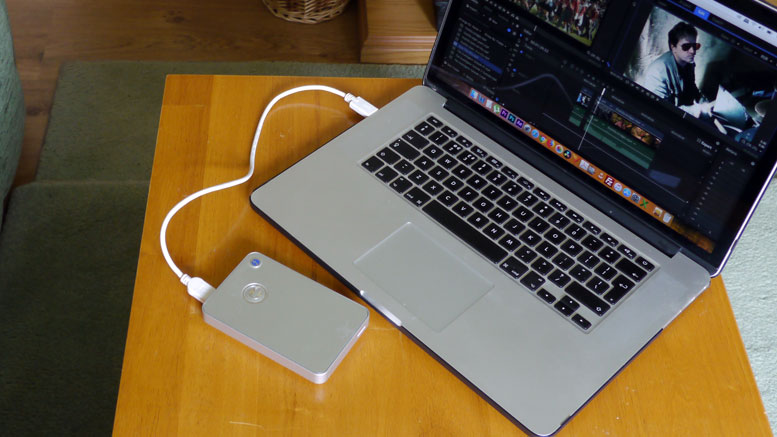
Buy more hard drives
Video shot in 4K can use up a lot of space on your Smartphone’s hard drive so you will need to download it to another storage device as soon as possible. Luckily, external hard drives are now cheap and are large enough to store all your lovely 4K video. If you are going to invest in an external hard drive try to get a solid-state drive. They are more expensive than normal disk hard drives but are far better at handling the editing needs of video shot in 4K. Solid-state hard drives also have faster read and write speeds compared with the older SATA drives and this means they are more stable for editing 4K video.
Future-proof you video
If you ever have to do an edit with HD and standard definition video you will see that standard definition video looks poor next to HD video. This is due to the fact it has a quarter of the pixels of HD video. When you scale up standard definition video to match HD it will lose much of its picture quality because of its lack of pixels compared with HD.

There will always be advances in the image quality of video so it’s important to film in the highest quality you can to future-proof your video. There may not be much need for video shot in 4K right now but that is not to say that this will be the case in the future. By filming in 4K now, you can avoid these up scaling issues with your video that might occur later. You will also have the best quality video for archive purposes.
Better resolution
Okay, this is the geeky bit and is for filmmakers who intend to use their Smartphone video for broadcast on TV. It’s a little complicated so if you don’t intend to broadcast your video don’t worry if this goes over your head. It can be useful though and help you avoid some post-production issues later. So if you edit your final video in 4K resolution in RGB 16 bit or 32 bit you can export your final HD video with a greater bit depth and colour space. Just remember to check your editing software supports this. Alternatively, you can convert your 4K video clips to HD through After Effects and get a greater bit depth and colour space.
So why would you want to do this? The standard for HD broadcast means that videos must have a minimal colour space of 4:2:2 10bit at 50mb a second. So converting your 4K video clips helps you meet this HD requirement. 4K video stores far more about the image than just fine detail, you also get more colour information. Most HD Smartphones, DSLR cameras and many other video cameras limit themselves to an 8 bit colour depth and 4:2:0 colour sampling with their internal codecs. This can result in stepped colour transitions from one shade to another, pixilation, digital looking colour and a brittle image that doesn’t grade well. The sensor itself misses data with a reduction in pixels and line skipping. When you convert 4K video with a high bit rate of 100mb into 10 bit 4:4:4 1080p HD, you get smoother tonality and better colour workflow in post-production.
Conversion
To do this you cannot just take your 4K files and convert them into 10 bit 4:4:4 1080p. You have to convert through a program that has 16 or 32-bit colour depth. Most editing programs work in RGB colour space (except Adobe Premiere Pro) but they need setting to 16 or 32-bit colour space before you export your footage into a 10-bit 4:4:4 1080p file. The codec itself also needs to support the higher bit rate too. Good examples of this are DNXHD, ProRes or Cineform. To store all that information you need to use a codec that won’t sub sample and can handle more than 8 bits per channel. So not just a 4:4:4 codec but also one with 10 or 16 bits per channel.
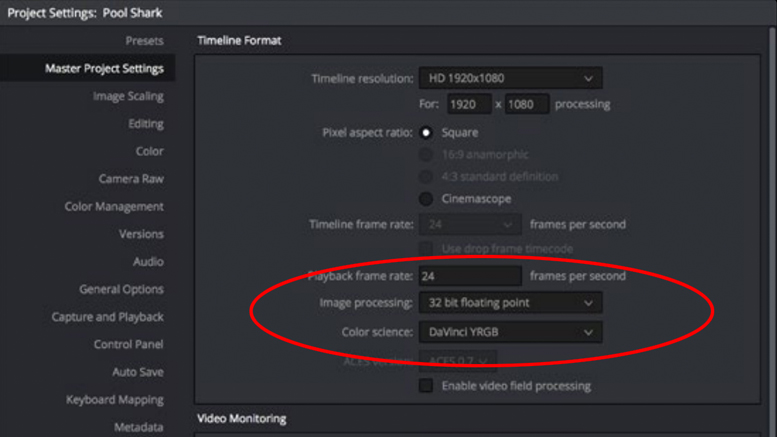
Workflow
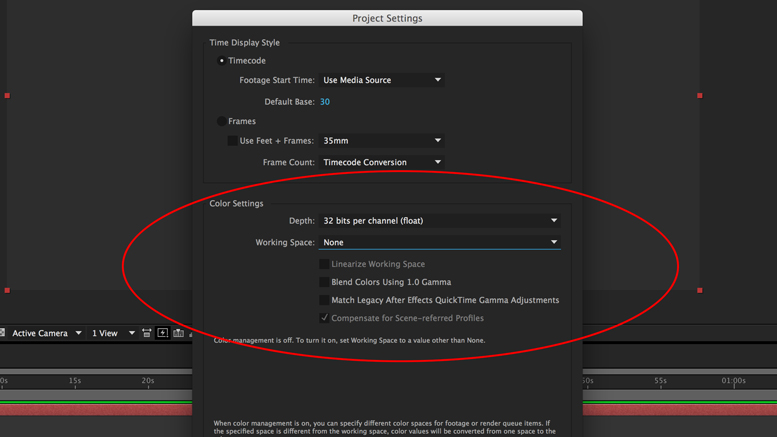
An example workflow of this would be to start a DaVinci Resolve project with a bit depth of 16 and import your 4K video clips. Scale them down to a 1920 x 1080 sequence and then export them to ProRes, Cinefom 4:4:4 or DNXHD. Setting the project to 16 or 32 bits per channel will convert your video clips shot in 4K to 16 or 32 bits per channel HD video. The same goes for After Effects. Go to the project’s settings and set your bit depth to 16 or 32 bit. Import your 4K video clips and scale them down on to a 1920 x 1080 sequence. Then export them to a 4:4:4 16 bit codec as mentioned above.
Garbage in – garbage out
There is debate about this conversion and the benefits it gives. I would say that if your original video has poor quality, conversion would not improve it. Be sure to light well and properly expose your video. You also need to shoot at the highest bit rate so your original video is as high quality as it can be. No conversion is going to help poorly shot video. So should you shoot 4K? I would say yes if your project requires it.
Whatever the debate may be about its merits, I do believe you get better HD video after conversion. The problem is larger file sizes and your Smartphone will fill up fast. I do think the rewards are huge though and not only will you get the best quality video you will have more choices in post-production.
Popular posts like this:
Making movies with your Smartphone is like guerrilla warfare
What is the best budget iPhone filmmaking kit?
What is the best budget Android filmmaking kit?
What is the best budget Smartphone filmmaking equipment?
What are the best free video editing programs?